Installing a home sauna is a great idea especially if you prefer relaxing at home and treating it as your sanctuary. What kinds of plans are out there if you’re planning on putting in an indoor sauna?
When installing a DIY indoor sauna, you have three main options: a custom-built sauna, a sauna kit, or a sauna conversion. Of these, conversions have the potential to be the least expensive, sauna kits require the fewest skills, and custom builds will yield your perfect sauna. The best option for you will be based on your needs, skills, and budget.
Read on as we list the best plans for indoor saunas that you can do yourself.
The best indoor sauna plans
Having an indoor sauna will not only improve your home but bring numerous health benefits. Indoor saunas have grown in popularity especially with people who are looking for a holistic and more natural way to detoxify and improve their overall health.
Home saunas are a popular addition to many houses, especially as people are spending more time at home and considering ways to make their homes more comfortable and relaxing. If you’re interested in installing an indoor sauna yourself, you have three options:
- Custom sauna houses and builds
- Sauna kits
- Sauna conversions
Keep reading for some information about each of these sauna options. I’ve also rounded up some of the best YouTube videos giving great examples of each type.
DIY custom sauna houses and builds
A custom-built indoor sauna will enable you to have a unique indoor sauna that is unlike any other. Customization means that it will be designed to fit your home using your hand-picked materials and add-ons.
Custom sauna houses require an advanced level of skill when it comes to construction and are also considered the most expensive type because you will have to purchase all materials and equipment. Estimated costs for a custom indoor sauna can reach up to $9,000.
Check out these five custom builds to see what can be done when you’re starting from scratch.
DIY barrel sauna inside a cabin
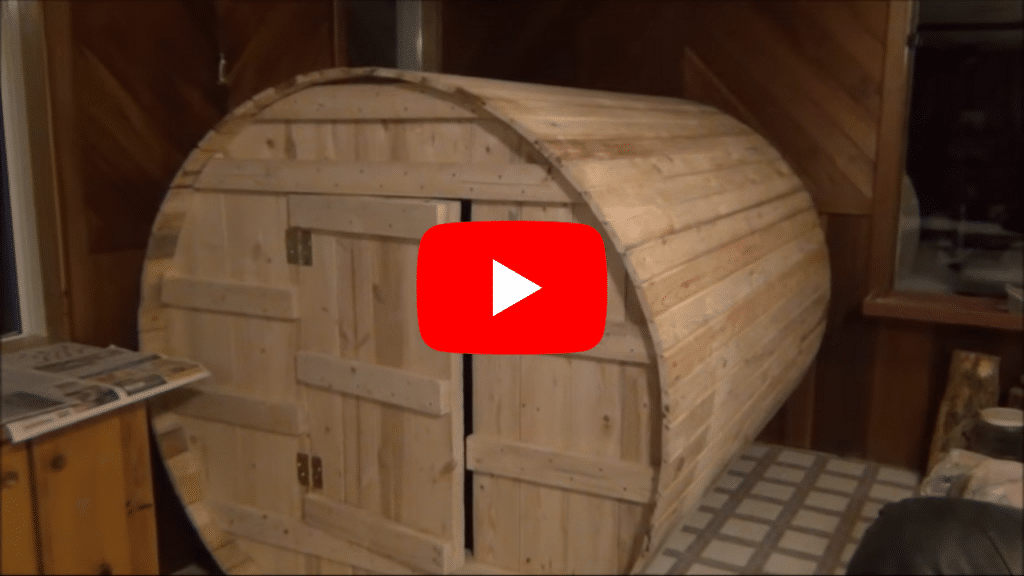
Wally Knorr Canadian Outfitter
Barrel saunas are a popular, modern option compared to the traditional square or rectangle saunas. For this plan, the builder used 24 boards of 2×6 lumber measuring 6 feet long. With studs, screws, aluminum foil, and knotty pine planks, this true DIY project doesn’t need a lot of fancy material or material that’s hard to find so it makes it a cheaper option as opposed to buying a sauna unit.
To make the barrel shape, plywood was used and cut in a circular shape. As a guide for the circular shape, a piece of wood was hammered into the middle of the plywood and you can turn it like a clock’s hands to draw a big circle. A handsaw was used to cut the plywood.
Support beams were placed in at least three places in the bottom to prevent the barrel sauna from moving. When placing the beams for support, make sure that the weight is equally distributed. As a finishing touch, the whole barrel sauna was sanded down and stained on the outside using a light wood stain.
Finnish-style sauna

Simpson Properties
In building this Finnish-style sauna, the builder turned to The Art of Sauna Building for guidance and help to turn his vision into reality. A Finnish-style sauna utilizes dry heat and you can add water on top of the stones to create steam or humidity.
One good thing about this build is that he was able to break down the costs and materials he used to build the sauna. He went into a very detailed step-by-step plan from blueprinting the layout to the different materials he used which include: Saunacore heaters, foil vapor barrier, framing material, 1×4 clear cedar, tiles for flooring, and glass door. The total cost came out to be approximately $6,800 resulting in a sauna measuring 4 feet wide by 5 feet deep and 7 feet tall.
The builder is a licensed electrician and this certainly helps with the wiring and electrical work needed. He strongly suggests using an expert licensed electrician if you want to build your own home sauna.
Carbon fiber infrared sauna room

cedartubs
The first step to installing a sauna is to choose the location where you will put the sauna inside your home. Location is key and the space you choose shouldn’t be too big because smaller areas will heat up more quickly and efficiently.
This video also provides a great formula for calculating how many infrared lamps you need per cubic foot of the room. The formula used is as follows: cubic feet of the room (length x width x height) multiplied by 15. The solution will give you how many watts of heating power you will need.
Placing the infrared heaters closer to the body ensures that the sauna will be working more efficiently. Lamps should be placed in all directions front, back, top, and sides. Cedar is a preferred material to use inside the sauna because it is softwood that doesn’t get too hot and is resistant to decay.
Cheap DIY infrared sauna

Fully Marissa
This near-infrared sauna install has a total cost of $400. The materials used include tent, bulbs, clamps, shoe rack, small and large goggles, sauna cap, and extension cord.
Most of the materials were brought from Amazon and it is pretty easy to assemble. The tent assembly is the hardest part and might require another pair of hands making it a two-person project. Another great insight from the builder is to pinpoint the area where you want the sauna to be installed and actually measure it to make sure it fits and give considerations for space if the area has a door that needs to be opened.
Indoor sauna build

The Spa & Sauna Company
The builder used a Sauna-Sato 30 mm SPU Heat panel that is double coated in foil to provide optimal insulation. The panels are joined together by foam and screwed together.
To incorporate air into the sauna, two air vents were cut and drilled into the walls. One of the air vents was installed near the sauna stove to incorporate oxygen and the other one was installed near the roof of the sauna to naturally air the room. The air vent will also help with air-drying the sauna after each use.
DIY sauna kits
DIY sauna kits contain all the materials and hardware that you would need to build an indoor sauna. Since it comes with all the materials needed, you just have to add in labor, tools, stud framing, insulation, and wiring.
Most people who are not master builders tend to gravitate towards DIY sauna kits because they require less construction skill and knowledge. You can add customization into DIY sauna kits especially when it comes to the design, shape, and aesthetic.
The instructions that come with the sauna kits are pretty straightforward and are a cheaper alternative than a full-on DIY sauna room.
DIY sauna kits are usually sold per square foot with ranges from $60 to $120. If you are looking to build a standard sauna, this can cost around $3,000. Infrared sauna kits are more expensive and can range from $5,000 to $7,500.
Installing a precut sauna kit
sengsationa1
This install plan covers everything that is involved with installing a precut sauna kit. The sauna space is pretty small at 4 feet by 4 feet.
The different steps in this plan include:
- Unboxing the sauna kit
- Cutting the door
- Installing the vapor barrier
- Installing cedar
- Installing the heaters
- Installing the benches
- Installing and trimming the door
The builder reiterated that the pre-cut feature of the sauna kit doesn’t mean that it comes ready to install, since every single board still needs to be cut to size.
Two-person elite far infrared sauna

Vital Health Saunas
This plan explains how to assemble a 2-person far infrared sauna. The most impressive thing about this plan is that assembly only takes 5 minutes.
The correct assembly starts with the two walls of the sauna, bench, third wall, and door. The last piece to install is the roof of the sauna. All the pieces click together through a tongue and groove locking mechanism and you don’t even need any tools to assemble this type of sauna.
It takes two people to fully assemble the kit. It might be doable with one person, but it will certainly be more difficult and take longer.
Assembling JNH Lifestyles

Live Free
JNH Lifestyles saunas are popular and easy to assemble. This specific infrared sauna can go up to 140°F. The first step is to build the “box” and then install the panels. All the parts click together and are easy to put together.
The only tool that the builder used is a screwdriver to tighten screws. One of the best features of this sauna is the speakers that allow you to listen to music while inside the sauna.
Installing a radiant heat home sauna

Matt Justice [Clever Leverage]
Dubbed as one of the easiest saunas to put together, this particular sauna is quite popular for home installations. The glass door of the sauna is already installed in the front panel which means that you only have to assemble the four walls.
Even though this sauna is easy to install, the builder still recommends getting at least one other person to help you. The whole assembly will take less than an hour.
The trickiest part in the whole assembly is hooking up cables that are placed on the roof of the sauna. All the wires and cables are labeled which makes it easy to determine where to put it in. For tools, the builder used a step stool to get to the roof and a screwdriver to secure the screws.
Bluestone/Auburn indoor sauna

ahsaunas
Installing this sauna requires some drill handling skills. You don’t have to be an expert carpenter but at least have some experience using the drill.
Compared to other sauna kits that have materials that all click and lock together, this will require a little more effort. The builder also uses a rubber mallet to make sure that the pieces fit with each other and with no space in between.
It is recommended to have two people with the assembly and installation.
DIY luxury indoor sauna
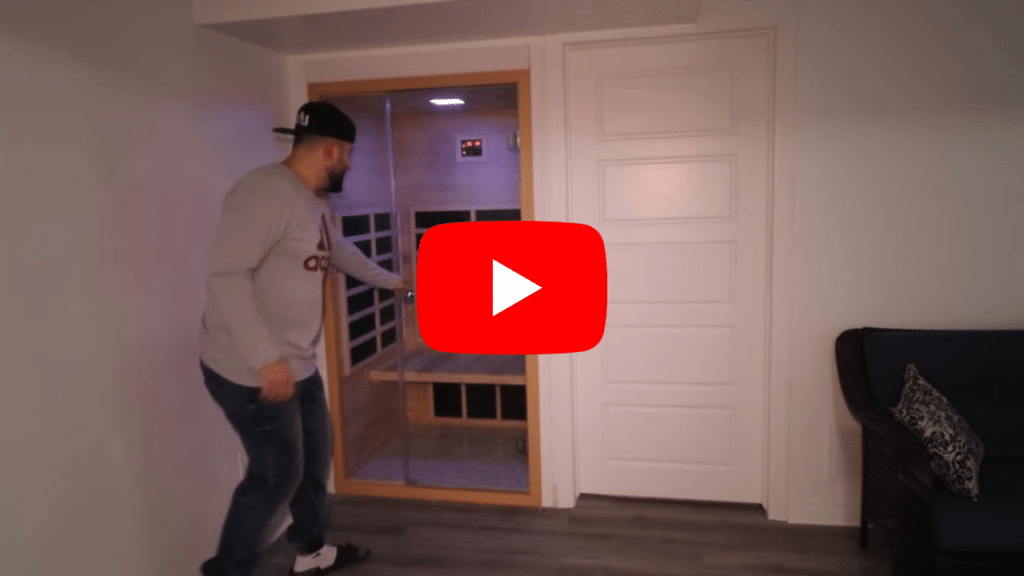
The Sargi Family
This ultimate DIY project entails building a custom sauna inside a wall in the basement area. Part of the basement area is also a home gym and a home sauna completes this home renovation.
For this project, they opted for an infrared sauna because they don’t want to add humidity to their home. The infrared sauna is made for two people but it looks like a tight fit inside. In the end, the infrared sauna beautifully blends into the house and looks like it was made into the home. The end product is a fancy and luxurious sauna with a built-in sound system.
DIY sauna conversions
If you are looking to save money and space in your home, you can look into converting an existing building or room in your house into a sauna.
DIY sauna conversions are a popular option especially with people who live in a smaller living space. Converting an extra bedroom or bathroom, a closet you’re not using, or a storage room will be less expensive than fully customizing and building a standalone sauna.
To convert a storage room or closet into a sauna, you will need an advanced level of skill and a whole lot of imagination since you are working within an existing space. The estimated cost for this project can range from $2,500 to $10,000 depending on what materials you want to use.
Bathroom to sauna conversion

ASAP Fitness
This plan converted a 5′ x 7.5′ bathroom into a sauna. The area measures 380 cubic feet which is a perfect size for a sauna because the smaller the space the faster and more efficiently it will heat up.
The whole bathroom was demolished and the toilet and sink were removed as well as the flooring. The plumbing had to be capped off and the cement board had to be waterproofed. The whole area was insulated using foil vapor barriers that help with locking the moisture. The walls were replaced by tongue and groove cedar walls and a 220v 9-kilowatt infrared heater was installed. A new circuit had to be run from the breaker box which you might need an electrician.
The last step is grouting the tile and the result is a beautiful multi-person sauna that all members of the family or your friends can enjoy.
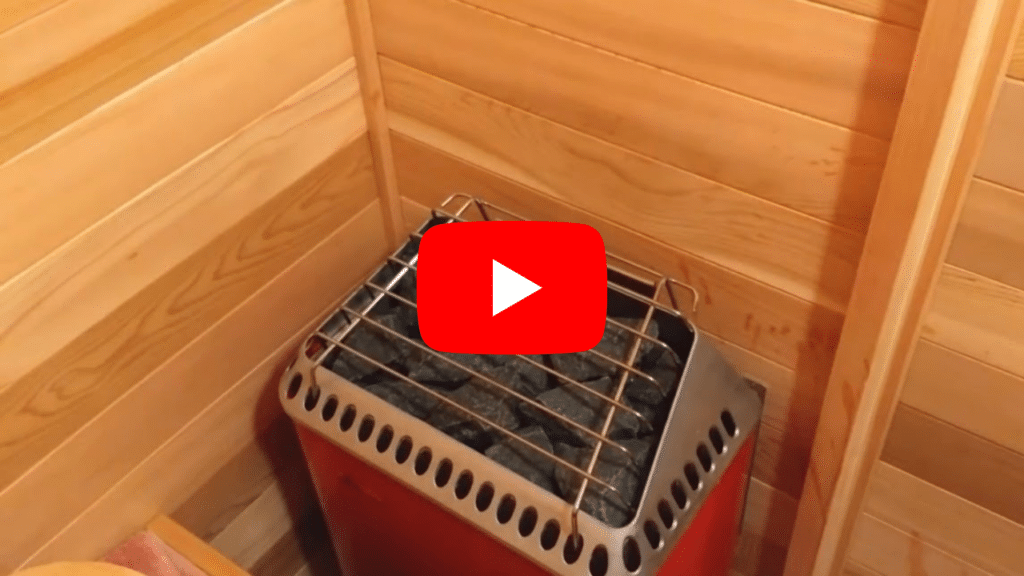
Storage room to sauna

Kristi Eramo O’Connell
This build converted a storage room inside a house into a sauna. The first step is to frame the area so that insulation can be installed properly. Fiberglass insulation was used then wrapped with a thermal barrier to radiate the heat inside the sauna.
Cedarwood was installed all over the sauna room to give it a more traditional sauna feel. The cedar was cut a little bit short because the heat will expand the material quite easily so the builder chose to give it space.
For the heat, an infrared heater was chosen as well as sauna rocks to help heat the space. The bulk of the cost of the whole project is the cedar wood totaling $1600 but this depends on how big your space is. The other materials used cost approximately $500.
Closet to infrared sauna

This infrared sauna was built inside a closet sitting in a spare room using the following materials: safety blankets measuring 5’x8′, 4 infrared bulbs of 250 watts, and a thermometer.
The blanket essentially has to cover the whole area from the ceiling to the bottom of the floor. Since it is inside a closet, they used the bar inside to hold the security blanket in place as well as the closet brackets.
To prevent the infrared bulbs from heating up too much, it is set on a porcelain bulb holder and connected with an extension cord. All materials used are cheap and readily available which makes this project super easy and affordable.
Hall closet to sauna

judge Dredd 650
One of the advantages of turning an unused closet into a sauna is that it already comes with a door that separates the sauna from the rest of your home.
In this plan, the inside of the closet was lined with insulation. Three infrared lights were used as the heat source and a thermometer can be found inside the closet to determine the temperature.
Bedroom to 2-person sauna

Becky figures it out!
This 2-person sauna was built into the bedroom and the finished product looks like an added closet with a sauna inside. The major steps include removing the drywall down to the studs, introducing insulation, new flooring, and reframing.
For the doors, they used cedarwood with a mirror in the middle on the outside and a reflective surface on the inside to help with insulation. For the flooring, they decided to use creek rock from the local hardware store. The rocks have different sizes and shapes which help with the texture and look of the sauna floor. Grout was poured in between the rocks to create a seamless floor and minimize the spaces between the rocks.
The inside of the sauna has cedar walls and a ceiling. They cut the wood using a table saw so that it locked together like a puzzle and created a nice and traditional effect.
Bathtub to infrared sauna

Heat Lamp Saunas
This plan uses a portable infrared sauna that can be placed in the shower or inside the closet. The main thing to consider is that there should be enough space between your body and the light so that you can be comfortable.
This plan is perfect for people who live in smaller spaces like apartments and condominiums. It works great in the tub because there is already a built-in barrier to trap heat like glass sliding doors or a shower curtain.
Indoor garage to sauna

Steve Beilstein
This sauna took 8 hours to build and cost $400 which is a cheaper alternative to buying a precut sauna. The sauna measures 6 feet tall and 4 feet wide.
The first step is to draw up a plan and build the foundation or framing of your sauna. Once it has a frame, you need to work on insulation. For insulation, the builder used a 48-inch roll of Reflectix which can also be used as a vapor barrier.
Two heat lamps and a 1500 watt space heater were used for heating and a chair was placed inside. The space inside this homemade sauna is small and it can only fit one person at a time.
Shower to steam room and sauna

SoCal Sauna
This beautiful home remodel incorporates a steam shower and sauna inside the master bathroom. The whole bathroom floor plan flows together well and is seamless.
With the steam shower and sauna side by side, you can easily hop from one to the other. The area used to be a regular tower and bathtub. The sauna heater is from Helo and can go up to 130°F.
Basement to sauna

fvi1210
In this plan, a regular 2×4 framing lumber was used to create the frame. The builder used two different breakers, one for the main heater and another one for the light bulb and additional infrared heaters.
All electrical work was completed before installing the insulation. As a vapor barrier, a paper-based foil was used.
Having a basement sauna will enable you to maximize the dead space in your basement and repurpose it into something useful that you can use for relaxation.